Advanced Configuration
Click
. The options needed to fully configure a device will be displayed.Advanced Settings
These options allow you to change where the device(s) will attempti to connect as well as the ability to set the readers to either DHCP (preferred) or static IP addresses.
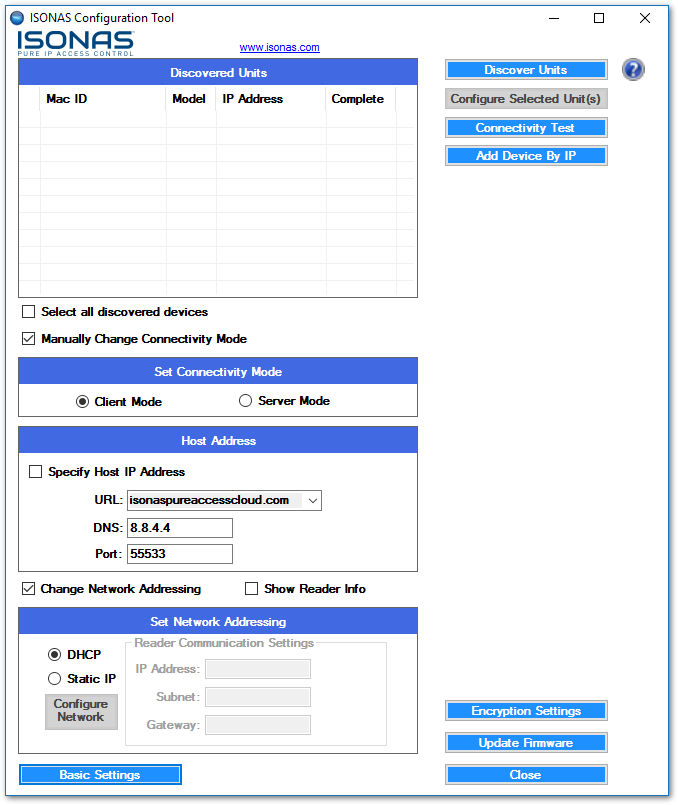
Establishing a connection to Zentra:
- All devices must be set toClient Modein order to initiate a connection with Zentra.Server Modeis reserved for updating the firmware of the devices only.
- TheHost Address URLcan be accessed via the drop-down menu.
- The host address is set toby default.isonaspureaccesscloud.com
- If you are attempting to connect to a Demo tenant, you will need to direct the device to.isonaspureaccessdemo.comThis environment has been deprecated.
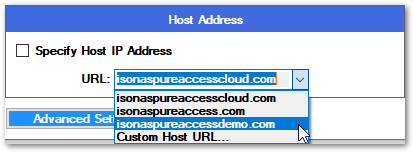
- If your tenant is on our legacy environment, this will need to be.isonaspureaccess.comThis environment has been deprecated.
- ForPure Access Manager, click
and then input the server’s IP in theSpecify Host IP Address
field.IP Addr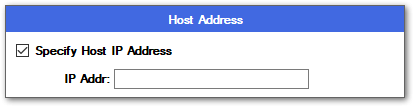
- DNS should be left as the default 8.8.4.4 (which is Google’s free DNS service provider). If this value is changed, ensure it is being directed to a working DNS server.
- All devices are set toDHCPby default. This is the recommended IP addressing method for Zentra. If static addresses are being used, ensure that all of the network addressing values are correct.
- Once all values have been set, select the checkbox of the device in the
window and clickDiscovered Units
. TheConfigure Selected Unit(s)
column should sayCompleteYes, the configure button should have acheck marknext to it, and the unit should reboot (see image below). - Click
to push the configuration settings out to multiple readers at the same time. If static IP addresses are being assigned, however, units must be configured individually.Configure Selected Unit(s)
To verify the above settings, you can highlight a device then click on
Show Reader Info
. More information on this can be found in the Review Existing Settings on a Device article. 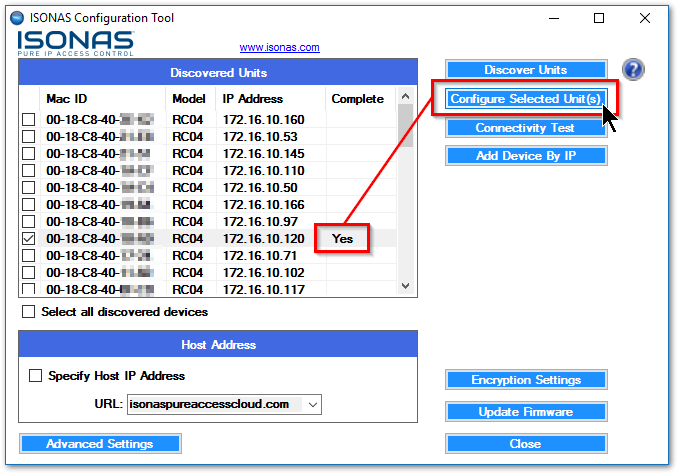
Figure 8 – Configure Selected Unit
If you were unable to configure the units using the above information, please see
Review Existing Settings on a Device
to ensure everything is configured correctly. If the reader information appears correct, please have your IT team review the network configuration settings and best practices
.